Avaya Network Alchemy
These instructions help you configure your Avaya Network Alchemy phone system to work with TIM Plus. Contact your system maintainer if you are not familiar with the configuration of your PBX.
Support files
Ensure the following support files exist in the /config/ folder of the TIM Plus application:
Avaya Network Alchemy.TDS
Avaya Network Alchemy.TDT
Contents
Configure the SMDR output
You may need to purchase a license to enable SMDR on this PBX. Please speak to your system maintainer if you are unsure.
The Avaya Network Alchemy uses the Avaya Call Log software to configure the SMDR data. As the application will be outputting the data to a file, the installation of the Avaya Call Log software needs to be performed on the same machine as TIM Plus. A copy of the Avaya Call Log application can be found on your Avaya Administration CD. Your system maintainer should be able to supply you with a copy of the software.
The Avaya Call Log software does not run as a Windows Service; therefore, you must ensure that the application is never stopped because you may lose SMDR data.
Configuring Avaya Call Log
Follow the steps below to configure the Avaya Call Log software:
Start the Avaya Call Log application.
From the
Filemenu, selectSelect Unit.In the first field, enter the IP address of your Avaya Network Alchemy.
In the second field, enter the password for your Avaya Network Alchemy and click the OK button.
From the
Filemenu, selectLog Option.From the Select Logging Information window, choose the Periodic option.
Type C:\Program Files\Tri-Line\TIM Plus\spool\data.{sitecode} in the
Log Filenamefield, replacing {sitecode} with the ID of the site you are logging. To obtain the ID of a site, hover the mouse pointer over it on theDirectorypage in TIM Plus and it will be displayed as a tooltip as shown below:
Click on the
OKbutton to apply the settings.
Configure TIM Plus
Follow the steps below to configure TIM Plus to connect to your Avaya Network Alchemy:
- Click on the
Directorytab. - If you don't have a site set up, press
Addand selectPBXfrom the drop-down menu. In the dialogue window, name your site and then selectAdd. - Locate the site object you want to configure in the Directory, click on it and select
Properties.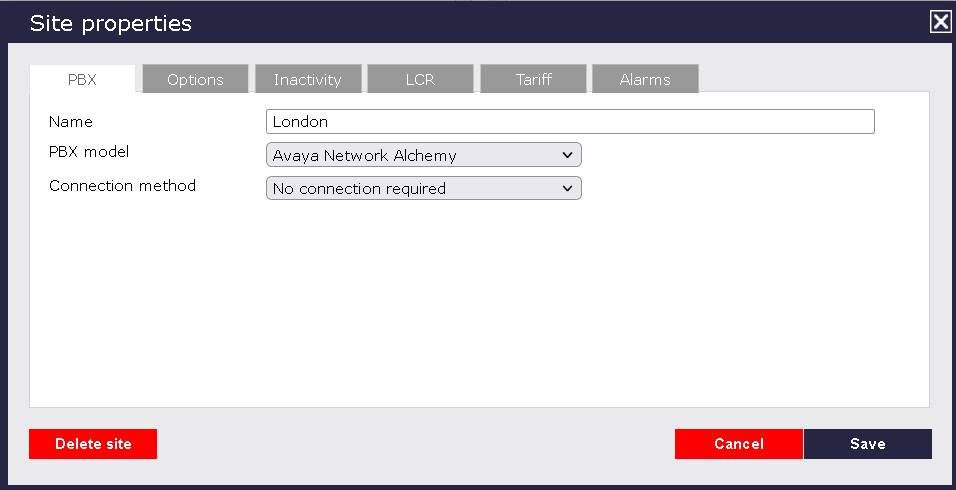
- In the Site Properties window, select Avaya Network Alchemy from the PBX model drop-down list.
- In the Connection method field, select No connection required from the drop-down list.
- Click on the
Savebutton to apply the settings.